Web images are everywhere and they can make or break your site’s performance. A single unoptimized image can slow a page by more than 50 percent and frustrate visitors. Most people think slapping a smaller file online is enough to fix it. The real breakthrough happens when you understand how smart format choices and invisible improvements can actually make your images work harder—and faster—without losing their visual punch.
Table of Contents
- Step 1: Analyze Current Image Usage And Formats
- Step 2: Choose The Right Image File Types For Web
- Step 3: Resize And Compress Images For Optimal Performance
- Step 4: Implement Proper Alt Tags And Descriptions
- Step 5: Test Image Load Speed And Optimize Further
Quick Summary
| Key Point | Explanation |
|---|---|
| 1. Conduct a comprehensive image audit | Analyze and document all images on your site to identify format, size, and resolution for optimization opportunities. |
| 2. Choose the right file formats | Select appropriate image formats (JPEG, PNG, WebP, SVG) based on content type and quality requirements to enhance performance. |
| 3. Resize and compress images effectively | Resize images to their display dimensions and use compression techniques to significantly reduce file sizes without quality loss. |
| 4. Implement meaningful alt tags | Create concise, descriptive alt tags to improve accessibility and enhance search engine discoverability for visual content. |
| 5. Test load speed and optimize | Use tools to assess image loading performance and implement techniques like lazy loading for a faster, more efficient website. |
Step 1: Analyze Current Image Usage and Formats
Before diving into image optimization, you need a comprehensive understanding of your current website’s visual ecosystem. Analyzing your existing image usage and formats sets the foundation for strategic web performance improvements. This crucial first step helps you identify potential optimization opportunities and create a targeted approach to image management.
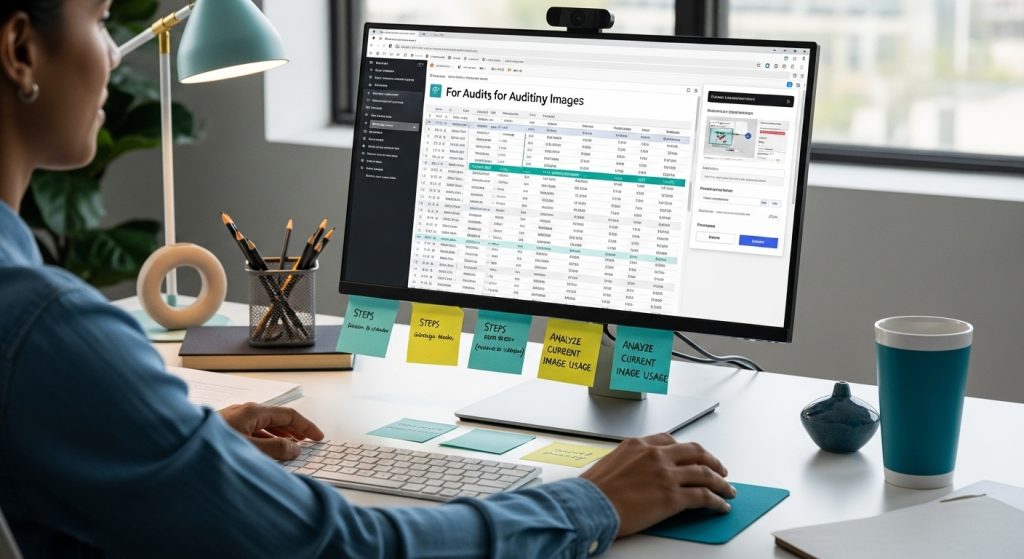
Start by conducting a thorough audit of all images currently deployed across your website. Use web crawling tools like Google Search Console to generate a complete inventory of your site’s visual assets. Examine each image’s file format, resolution, and size. Pay special attention to images that might be slowing down your page load times or consuming unnecessary bandwidth.
Focus on identifying the specific image formats currently in use. Common web image formats include JPEG, PNG, WebP, and SVG. Each format has unique characteristics that impact website performance. JPEGs work well for photographs, PNGs are ideal for graphics with transparency, WebP offers superior compression, and SVGs provide scalability for vector graphics. Your goal is to understand which formats dominate your current image landscape.
Utilize professional tools to gather detailed insights about your images. Northwestern University’s web imagery guidelines recommend using browser developer tools and performance analysis platforms to assess image metrics. Look for critical data points such as:
- File sizes for each image
- Current image format distribution
- Resolution variations
- Compression levels
- Loading performance impact
During your analysis, create a comprehensive spreadsheet documenting each image’s characteristics. This inventory will serve as a roadmap for your optimization strategy. Note any inconsistencies in image sizes, formats, or quality that might negatively impact user experience or search engine rankings.
Successful completion of this step means you have a clear, documented understanding of your website’s current image ecosystem. Your next actions will involve strategically transforming these insights into a streamlined, high-performance image optimization plan.
Step 2: Choose the Right Image File Types for Web
Selecting the appropriate image file type is a critical decision that directly impacts your website’s performance, user experience, and search engine optimization. Different image formats offer unique advantages and are suited to specific types of visual content. Understanding these nuances will help you make informed choices that balance image quality with file size and loading speed.
Photographic images typically perform best with JPEG formats, which provide excellent compression while maintaining reasonable visual quality. These files work wonderfully for complex images with numerous color gradations, such as landscapes, portraits, and detailed product photographs. Modern web developers are increasingly turning to WebP, a next-generation format that offers superior compression and smaller file sizes compared to traditional JPEG, without sacrificing image clarity.
For graphics requiring transparency or featuring sharp edges and limited color palettes, PNG formats remain an excellent choice. According to Duke University’s digital guidelines, PNG works exceptionally well for logos, icons, screenshots, and illustrations that need crisp details and transparent backgrounds. Vector graphics like logos and simple illustrations are best handled using SVG formats, which scale perfectly across different screen sizes without losing resolution.
When choosing your image format, consider these strategic factors:
- Visual complexity of the image
- Required level of detail
- Need for transparency
- Target device and screen resolution
- Compression capabilities
- Browser compatibility
To streamline your selection process, leverage modern image conversion tools that can automatically generate multiple format versions of the same image. Browser support for WebP has expanded significantly, but maintain JPEG and PNG backups to ensure compatibility with older browsers. Many content management systems and web development frameworks now offer automatic image format conversion and responsive image serving.
Successful completion of this step means you have a clear strategy for selecting image formats that optimize visual quality, file size, and website performance. Your chosen formats should align with your specific content requirements while maintaining fast loading times and excellent user experience.
Below is a comparison table summarizing the strengths and best uses of each major web image format to help you choose the right type for every scenario.
| Image Format | Best For | Strengths | Considerations |
|---|---|---|---|
| JPEG | Photographs, detailed images | Excellent compression, good quality | Not ideal for transparency; may lose quality with heavy compression |
| PNG | Graphics with transparency, logos, icons | Supports transparency, sharp edges, lossless quality | Larger file sizes than JPEG and WebP |
| WebP | All-purpose, both photos and graphics | Superior compression, maintains quality, supports transparency | Older browsers may need JPEG/PNG fallback |
| SVG | Logos, icons, vector graphics | Infinitely scalable, crisp at any size, tiny file size | Not suitable for complex photographs |
Step 3: Resize and Compress Images for Optimal Performance
Resizing and compressing images is a critical step in web optimization that directly impacts website speed, user experience, and search engine rankings. Proper image optimization reduces file sizes without compromising visual quality, ensuring your website loads quickly across various devices and network conditions.
Begin by determining the maximum display dimensions for your images based on your website’s design and layout. Most modern websites utilize responsive design principles, which means images should be sized to fit the largest potential display area while maintaining crisp resolution. Avoid uploading massive original images and expecting browser scaling to handle the workload. Instead, proactively resize images to match their intended display dimensions.
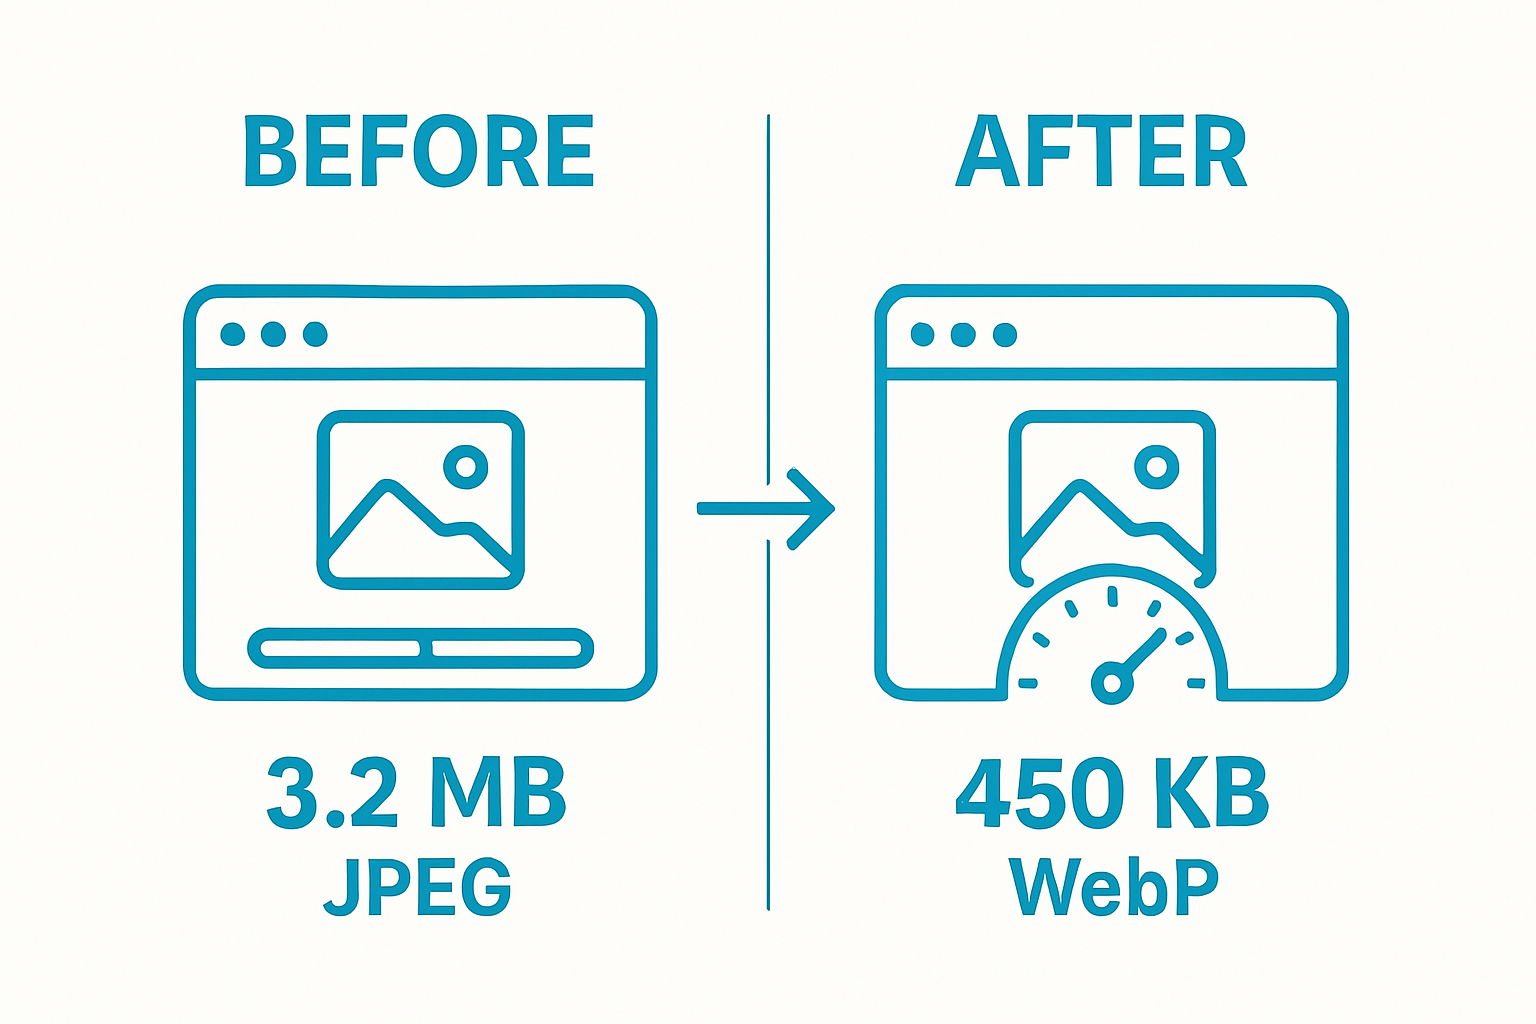
Compression techniques play a crucial role in reducing file sizes while preserving image quality. Lossy compression removes unnecessary data, significantly reducing file size with minimal perceptible quality loss. According to research from Harvard’s image optimization guidelines, aim to compress images to the smallest file size possible without introducing visible artifacts or degradation.
Utilize professional image optimization tools that offer intelligent compression algorithms. These tools analyze image content and apply context-aware compression techniques. Popular options include:
- Adobe Photoshop’s export settings
- Online tools like TinyPNG
- Content delivery network image optimization services
- Dedicated image compression software
When resizing and compressing, consider the specific requirements of different image types. Photographic images might tolerate higher compression levels, while graphics with text or sharp edges require more careful handling.
 Experiment with different compression levels to find the optimal balance between file size and visual clarity. Modern web development workflows often integrate automated image optimization processes that handle resizing and compression dynamically.
Verify your optimization efforts by comparing original and compressed images side by side, checking load times, and using performance measurement tools like Google PageSpeed Insights. Your goal is to reduce image file sizes by 60-80% without introducing noticeable quality degradation.
 Successful image optimization transforms large, unwieldy image files into lean, efficient visual assets that enhance rather than hinder your website’s performance.
Step 4: Implement Proper Alt Tags and Descriptions
Alt tags and descriptions are more than just accessibility features they are critical components of search engine optimization and user experience. Crafting meaningful alternative text transforms images from passive visual elements into strategic communication tools that enhance both website performance and content discoverability.
Start by understanding that alt text serves multiple purposes. These brief descriptions provide context for search engine crawlers, assist users with visual impairments using screen readers, and display when images fail to load. The most effective alt tags are concise, descriptive, and contextually relevant, offering a clear understanding of the image’s content and purpose without unnecessary verbosity.
Approach alt text creation as a strategic writing exercise. Instead of simply describing what the image looks like, communicate its function within the surrounding content. For instance, an image of a team meeting should explain the meeting’s significance or key outcome, not just list the number of people present. According to Southern Methodist University’s web guidelines, the goal is to provide meaningful information that adds value to the user’s understanding.
Consider implementing a systematic approach to alt text creation:
- Use clear, specific language
- Include relevant keywords naturally
- Avoid redundant phrases like “image of”
- Keep descriptions under 125 characters
- Reflect the image’s purpose in the content
For websites focused on e-commerce or visual content, alt tags become even more crucial. If you want to dive deeper into optimizing visual content strategies, read our comprehensive guide on SEO tips for ecommerce. Automated tools can help generate initial alt text, but manual review ensures accuracy and contextual relevance.
Verify your alt text implementation by testing with screen readers, checking image load failures, and reviewing search console reports. Effective alt tags should seamlessly integrate with your content, providing value to both human readers and search engine algorithms. Your ultimate goal is creating alternative text that enhances understanding, improves accessibility, and potentially boosts your website’s search engine rankings.
Step 5: Test Image Load Speed and Optimize Further
Testing image load speed is the critical final step in your web image optimization journey, transforming theoretical improvements into measurable performance gains. Performance testing goes beyond simple visual inspection, providing data-driven insights that reveal how your images impact overall website experience. This step ensures your carefully optimized images deliver the speed and efficiency modern web users expect.
Leverage professional performance testing tools like Google PageSpeed Insights and Lighthouse to conduct comprehensive image load speed assessments. These platforms provide granular analysis of your image performance, highlighting specific bottlenecks and offering actionable recommendations. According to Google Developers’ optimization guidelines, focus on metrics like First Contentful Paint, Largest Contentful Paint, and Cumulative Layout Shift to understand your images’ real-world loading characteristics.
Implement advanced techniques like lazy loading and responsive image serving to further enhance performance. Modern browsers support native lazy loading attributes, allowing images to load only when they enter the viewport. This approach significantly reduces initial page load times and conserves bandwidth. For websites with complex visual requirements, explore our landing page optimization strategies to integrate these techniques seamlessly.
Consider these key performance testing strategies:
- Compare load times before and after optimization
- Test across multiple devices and network conditions
- Analyze compression effectiveness
- Evaluate responsive image implementation
- Check cross-browser compatibility
Dynamic content delivery networks (CDNs) can provide additional performance enhancements by serving images from geographically distributed servers. These networks intelligently cache and serve your optimized images, reducing latency and improving global access speeds. Monitor your image performance regularly, treating optimization as an ongoing process rather than a one-time task.
Successful image speed optimization is characterized by consistent performance across different devices, rapid loading times under 2-3 seconds, and minimal layout shift. Your goal is creating a seamless visual experience that doesn’t compromise website speed or user engagement. Continuous testing and incremental improvements will ensure your web images remain lean, fast, and visually compelling.
To keep your optimization process on track, here is a concise checklist table summarizing key actions to verify image quality, performance, and SEO improvements after optimization.
| Verification Step | What to Check | Tools/Methods |
|---|---|---|
| Compare originals vs. compressed | Visual quality, absence of artifacts | Side-by-side visual review |
| Measure page load times | Impact of image optimizations | Google PageSpeed Insights, Lighthouse |
| Validate alt tags | Clarity, relevance, keyword integration | Screen reader testing, manual review |
| Test responsiveness | Images display correctly on all devices | Browser responsive mode, mobile devices |
| Review compression ratios | File size reduction achieved | Image editing software metrics |
| Check browser compatibility | Image formats supported everywhere | Test across mainstream browsers |
| Monitor ongoing performance | Continued fast loading, minimal layout shift | Performance monitoring tools, regular audits |
Unlock Blazing Website Performance And Outrank Your Rivals
Are you tired of slow load times holding back your website’s SEO potential? You learned in this guide how image format choices, compression tactics, and alt text strategies all impact speed and rankings. But true web excellence demands more than just image optimization. Overlooked issues like keyword cannibalization or landing page inefficiencies could undermine your efforts, no matter how visually optimized your site is.
Do not let hard work fall short. Get the full advantage with proven SEO tools designed to expose every threat to your visibility and conversions. Let the #1 Keyword Cannibalization Tool trusted by consultants and agencies help you reveal hidden keyword conflicts that slow your growth. Want to lift your landing page conversion rates while delivering flawless performance? See the difference with our Landing Page Optimization strategies and discover new ways to enhance user experience alongside site speed. Visit RankAligner now and secure your SEO wins before your competitors do.
Frequently Asked Questions
How can I analyze the current image usage on my website?
You can analyze your current image usage by conducting a thorough audit using tools like Google Search Console to inventory your site’s visual assets, including file formats, sizes, and resolutions.
What are the best image formats to use for web optimization?
The best image formats for web optimization include JPEG for photographs, PNG for graphics with transparency, and WebP for superior compression with excellent quality. SVG is recommended for vector graphics.
How do I resize and compress images for better web performance?
To resize images, determine the maximum display dimensions based on your website’s design. Use professional tools to compress images, focusing on lossy compression methods to reduce file sizes while maintaining visual quality.
Why are alt tags important for image SEO?
Alt tags are critical for image SEO as they provide context for search engines, assist visually impaired users, and enhance user experience by ensuring content remains accessible when images fail to load.
Recommended
- Understanding Technical SEO for Beginners Made Simple – Rank Aligner – Your Ultimate Keyword Cannibalization Problem Solver
- SEO Tips for Ecommerce: Proven Strategies for 2025
- Landing Page Optimization Tips for 2025: Strategies That Convert